Pop Spots Tutorial
Pop Spots Special Techniques
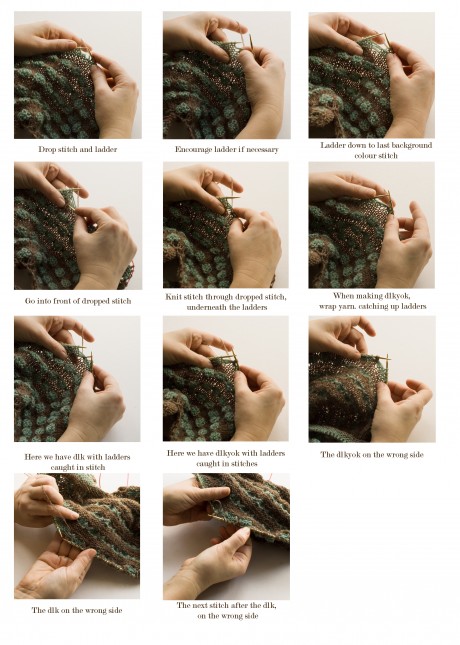
Here are detailed explanations and step-by-step pictures for dropping and laddering Pop Spots Stitches.
dlk and dlkyok
Knit 3 stitches, drop the stitch on your left hand needle until it unravels all the way down to the main colour
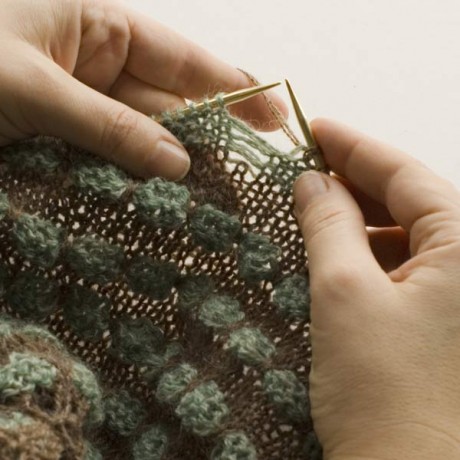
– you will have one stitch of your main colour floating, ready to be caught by your needle and six strands of unravelled yarn in the garter stitch colour.
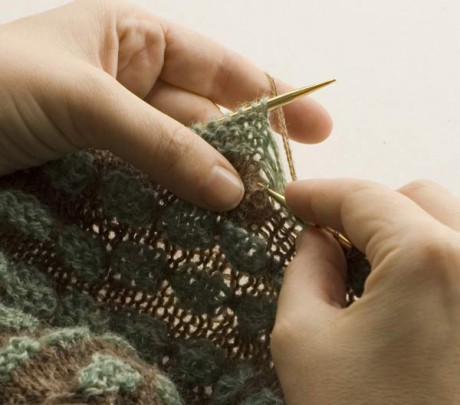
Poke your right-hand needle into that lone stitch in the background colour, from front to back, under the lines of unravelled knitting. Wrap your yarn round your right-hand needle as if to knit a stitch, pull the yarn through the background stitch, catching all the unravelled ladders. That completes the dlk stitch.
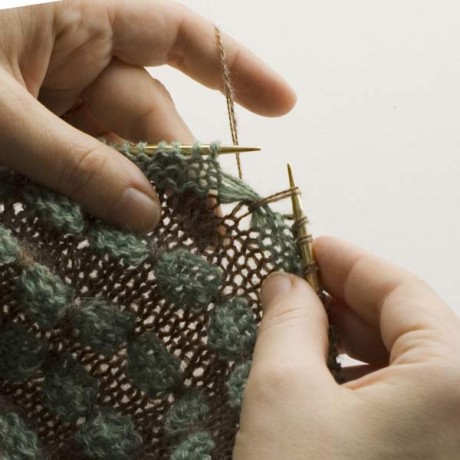
To complete the dlkyok stitch, continue by making a yarn over above the ladders
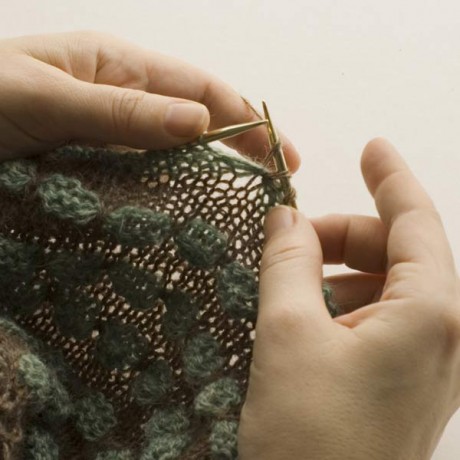
and then make another stitch in the front of the dropped stitch, including all the ladders.
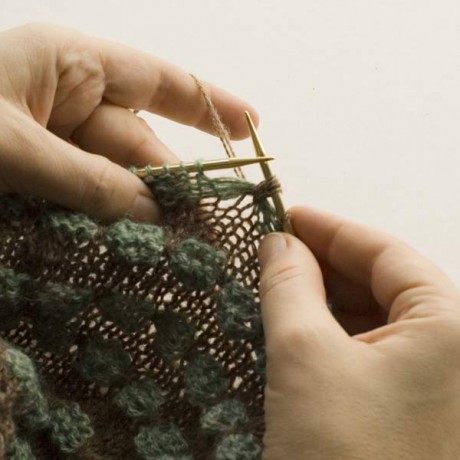
Three stitches have been made from one stitch.
Hola! Me encanta el tutorial y el chal el precioso.
Intentare hacerlo. Muchas gracias y saludos
Thank you so much for sharing this wonderful idea.
Kind regards
Irmi
merci pour ces explications et aux illustrations qui aident beaucoup ! :)
Thanks so much. I am working my gauge swatch and I plan to make a muffler-type scarf- rectangular rather than shaped. I would love to see the edges with slip3 to get a sense if what I am doing.
This is really an adorable pattern.
Bonjour
Peut-on esperer une traduction du patron en français ?
It’s very difficult for me ….but thank you for pictures !
dlk = ordinary row
dlkyok = increase row …
It’s oK ?
Do you project to have a french version ??
French version coming next week.
Thank You !!
confused. about where the 3rd stitch comes from – knit another st under the ladders — huh? please clarify thanks
Merci pour le tuto en image !! Du coup j’ai tout compris :)
Bitte um Muster für Rokkoko stricken . Vielen Dank.
Thank you for sharing. The pattern is brilliant and easy to follow. The only “a bit” difficult stage to grasp is where the three stitches come from, but if you follow the instructions it becomes clear. An additional picture after “Yarn over above ladders” and “Knit another stitch under the ladders ~ three stitches in one” might be beneficial for visitors.
Thank you for your feedback. You might want to share your ideas on Ravelry as well, as many knitters use the comment section as a reference for help and advice.
I found the spots easy but I’m completely flummoxed by the lace edging. Just don’t understand the instructions about how to begin. It says to cast on 7 stitches on the wrong side. Do they go on the left hand needle? And if so, how do you then knit the next row on the right side? Please can you help? Kind regards. Debbie
Hi Debra, If you can email us at the shop I’m sure we can help you with this.
Hi there! Lovely design !
For the spots I suggest you first knit into the stitch below the contrast colour rows and then drop the next stitch on the left needle. So change the order of the steps as described above in the photo tutorial. This way your stitch will never drop too far!